Administrator
When you created your account, a user with all rights was created: this is the Administrator, the profile that you will use first. Subsequently, we invite you to create other accounts in order to distribute responsibilities within your organization.
Give rights
You can give access rights to users from the Backoffice. Rights are assigned by zone (contact, finance, etc.) and with different levels: prohibited, reading, modification.
Access to the allocation of rights is done from the Backoffice in the contact folder for which you wish to give access rights (rights tab). For example, you can authorize the treasurer to access the accounting section but not the activities.
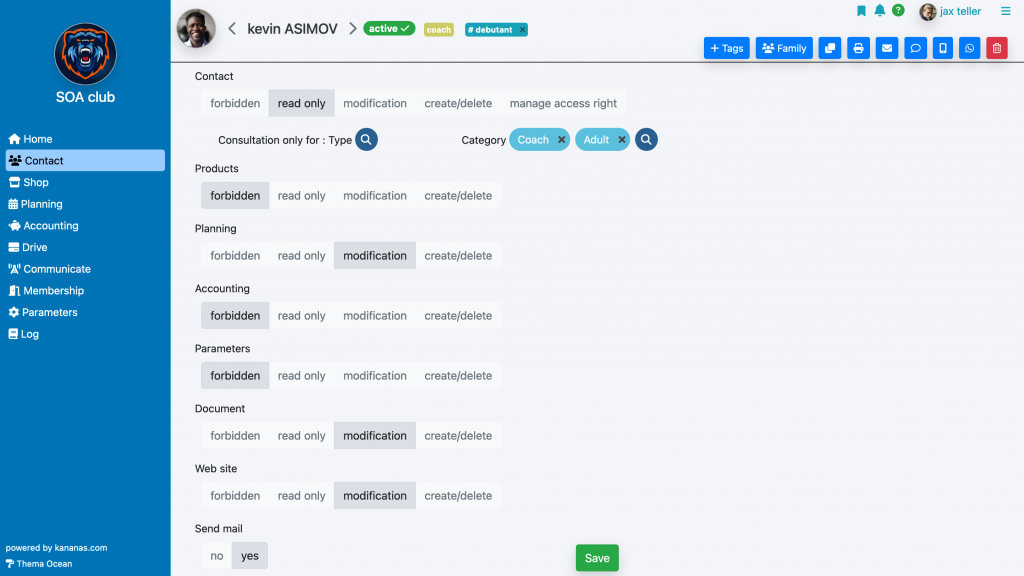
A user with the right to modify access rights cannot modify their own rights.
So that your members can connect to the Backoffice or their personal space (website), it is necessary to assign them a user code and a password.
An identifier was automatically generated when the file was created but you can modify it.
For security reasons, passwords are never displayed in clear text; it is the member who will have to choose them. Passwords are encrypted in the database and are never sent by email.
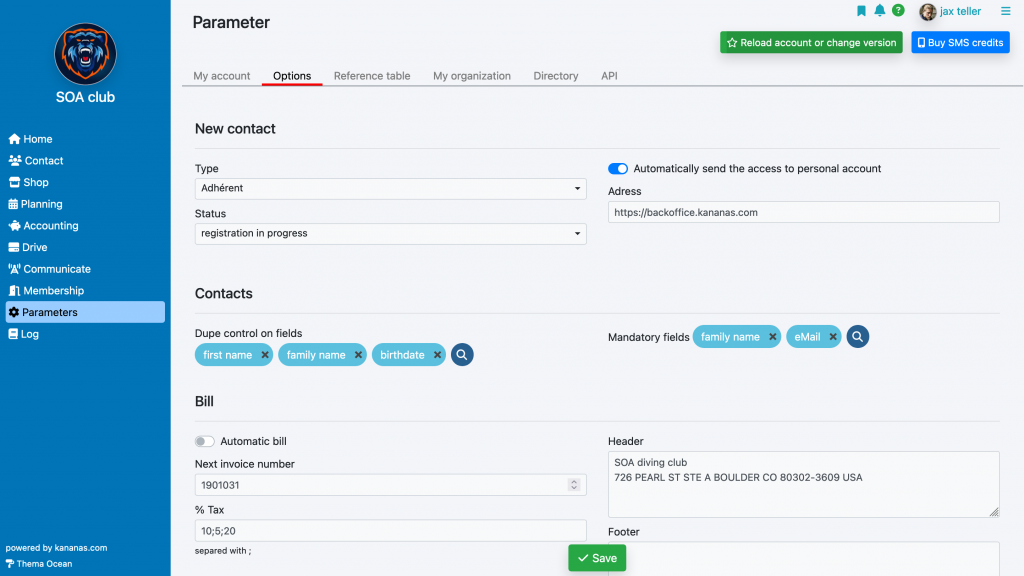
As soon as you assign Personal Space rights for consultation or modification, an email is automatically sent to the member to invite them to choose a password. You can perform the same operation by clicking on Send password. After choosing their password, the member will receive another email indicating the address of their personal space. This address can be configured in settings/my account – Options.
If you do not want access to be automatically sent to the member, you should check No in settings/my account – Options – Automatically send access to the personal space.
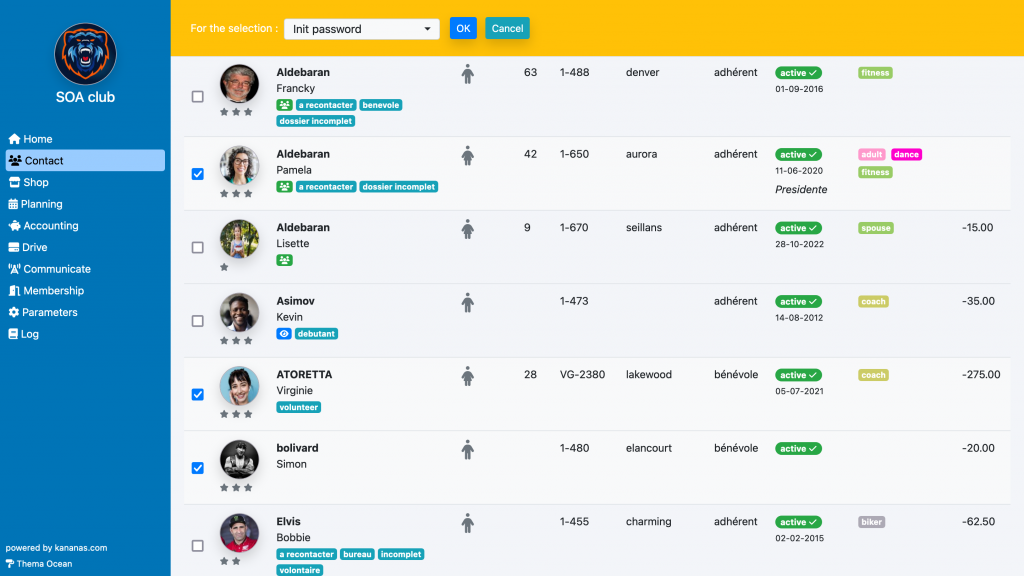
Tip: You can reset passwords (sending the password choice email) collectively from the contact list using the collective action field located at the top of the page.
To learn more about contact management